kendi sitesinde vagrant
“Vagrant is a tool for building complete development environments. With an easy-to-use workflow and focus on automation, Vagrant lowers development environment setup time, increases development/production parity, and makes the “works on my machine” excuse a relic of the past.”
şeklinde ifade edilmekte. ne işe yarar derseniz : yazılım ekibinizde yer alan geliştiriciler farklı platormlar kullanıyorsa geliştiricilere ilave bir iş yükü getirmeden yazılımın çalışacağı platforma sahip olmalarına ve yönetmelerine yardımcı olan bir araçtır. kendi başına bir sanallaştırma ortamı felan değildir.
ilk çıktığı zamanlar kurulum için biraz uğraşmak gerekiyordu. ancak artık rahatlıkla kurulum gerçekleştirilebiliyor. hızlıca kurulumu nasıl yapılır değinelim..
öncelikle eğer sisteminizde yoksa
fcicek@cicek:~$ sudo apt-get install virtualbox
virtualboxı kurmamız gerekmektedir. sonrasında vagrant
fcicek@cicek:~$ sudo apt-get install vagrant virtualbox-dkms
[sudo] password for fcicek:
Paket listeleri okunuyor... Bitti
Bağımlılık ağacı oluşturuluyor
Durum bilgisi okunuyor... Bitti
Aşağıdaki ek paketler de kurulacak:
  bsdtar bundler ruby-celluloid ruby-childprocess ruby-erubis ruby-ffi ruby-i18n ruby-listen ruby-log4r
  ruby-net-http-persistent ruby-net-scp ruby-net-ssh ruby-nokogiri ruby-rb-inotify ruby-thor ruby-timers
Önerilen paketler:
  bsdcpio
Aşağıdaki YENİ paketler kurulacak:
  bsdtar bundler ruby-celluloid ruby-childprocess ruby-erubis ruby-ffi ruby-i18n ruby-listen ruby-log4r
  ruby-net-http-persistent ruby-net-scp ruby-net-ssh ruby-nokogiri ruby-rb-inotify ruby-thor ruby-timers vagrant
0 paket yükseltilecek, 17 yeni paket kurulacak, 0 paket kaldırılacak ve 2 paket yükseltilmeyecek.
1.090 kB arşiv dosyası indirilecek.
Bu işlem tamamlandıktan sonra 7.459 kB ek disk alanı kullanılacak.
Devam etmek istiyor musunuz? [E/h] E
bağlantılı ve gerekli tüm paketler kurulacaktır. vagrant kutu mantığı ile çalışmaktadır.
https://app.vagrantup.com/boxes/search adresindeki hazır boxlardan birini kullanabilirsiniz.
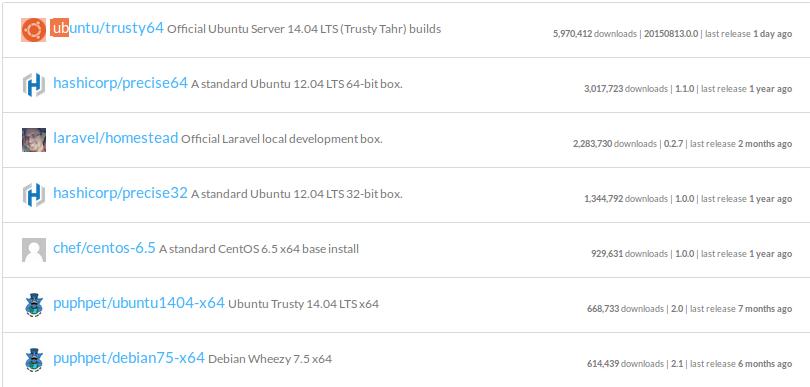
ben bu örnekte precise32 kullanacağım. test için kullanacağımız bu box indirilmesini ve kütüphanemize eklenmesini gerçekleştirelim..
fcicek@cicek:~$ vagrant box add precise32 http://files.vagrantup.com/precise32.box
==> box: Adding box 'precise32' (v0) for provider:
    box: Downloading: http://files.vagrantup.com/precise32.box
==> box: Successfully added box 'precise32' (v0) for 'virtualbox'!
şimdi sonraki adıma geçebiliriz. projemiz dosyalarının yer alacacağı bir klasör oluşturarak klasör içine girelim.
fcicek@cicek:~$ mkdir vagrant_project
fcicek@cicek:~$ cd vagrant_project/
“vagrant init” komutunu çalıştırarak “Vagrantfile” default konfigürasyon dosyasının oluşturulmasını sağlayalım.
fcicek@cicek:~/vagrant_project$ vagrant init
A `Vagrantfile` has been placed in this directory. You are now
ready to `vagrant up` your first virtual environment! Please read
the comments in the Vagrantfile as well as documentation on
`vagrantup.com` for more information on using Vagrant.
fcicek@cicek:~/vagrant_project$ ls
Vagrantfile
sonrasında “Vagrantfile” dosyasında
fcicek@cicek:~/vagrant_project$ nano Vagrantfile

  # Every Vagrant virtual environment requires a box to build off of.
  config.vm.box = "base"

  # Every Vagrant virtual environment requires a box to build off of.
  config.vm.box = "precise32"
olacak şekilde gerekli değişikliği yaparak vagrantı çalıştıralım.
fcicek@cicek:~/vagrant_project$ vagrant up
Bringing machine 'default' up with 'virtualbox' provider...
==> default: Importing base box 'precise32'...
==> default: Matching MAC address for NAT networking...
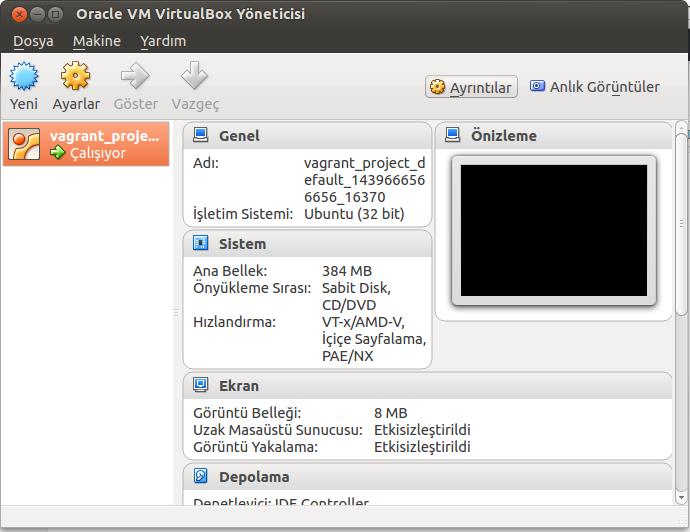
==> default: Setting the name of the VM: vagrant_project_default_1439666566656_16370
==> default: Clearing any previously set network interfaces...
==> default: Preparing network interfaces based on configuration...
default: Adapter 1: nat
==> default: Forwarding ports...
default: 22 => 2222 (adapter 1)
==> default: Booting VM...
==> default: Waiting for machine to boot. This may take a few minutes...
default: SSH address: 127.0.0.1:2222
default: SSH username: vagrant
default: SSH auth method: private key
default: Warning: Connection timeout. Retrying...
==> default: Machine booted and ready!
==> default: Checking for guest additions in VM...
default: The guest additions on this VM do not match the installed version of
default: VirtualBox! In most cases this is fine, but in rare cases it can
default: prevent things such as shared folders from working properly. If you see
default: shared folder errors, please make sure the guest additions within the
default: virtual machine match the version of VirtualBox you have installed on
default: your host and reload your VM.
default:
default: Guest Additions Version: 4.2.0
default: VirtualBox Version: 4.3
==> default: Mounting shared folders...
default: /vagrant => /home/fcicek/vagrant_project
vagrantımız başladı. durum kontrolünü yapmak istersek
fcicek@cicek:~/vagrant_project$ vagrant status
Current machine states:

default                   running (virtualbox)

The VM is running. To stop this VM, you can run `vagrant halt` to
shut it down forcefully, or you can run `vagrant suspend` to simply
suspend the virtual machine. In either case, to restart it again,
simply run `vagrant up`.
fcicek@cicek:~/vagrant_project$
virtual box ı açacak olursa yeni bir sanal makine oluşturulduğu başlamış olduğu görülmektedir.
şimdi sanal makinemize bağlanalım
fcicek@cicek:~/vagrant_project$ vagrant ssh
Welcome to Ubuntu 12.04 LTS (GNU/Linux 3.2.0-23-generic-pae i686)

 * Documentation:  https://help.ubuntu.com/
New release '14.04.3 LTS' available.
Run 'do-release-upgrade' to upgrade to it.

Welcome to your Vagrant-built virtual machine.
Last login: Fri Sep 14 06:22:31 2012 from 10.0.2.2
vagrant@precise32:~$
her şey yolunda görülüyor gerçekten öylemi son bir iki ufak kontrol daha yapalım.
vagrant@precise32:~$ uname -a
Linux precise32 3.2.0-23-generic-pae #36-Ubuntu SMP Tue Apr 10 22:19:09 UTC 2012 i686 i686 i386 GNU/Linux
vagrant@precise32:~$ ping google.com
PING google.com (216.58.209.14) 56(84) bytes of data.
64 bytes from sof01s12-in-f14.1e100.net (216.58.209.14): icmp_req=1 ttl=63 time=48.5 ms
64 bytes from sof01s12-in-f14.1e100.net (216.58.209.14): icmp_req=2 ttl=63 time=47.7 ms
bu yazı ile vagranta giriş yapmış olduk. bir sonraki yazıda daha detaylı konulara değineceğiz.